Lemon Poppy Seed Pound Cake

Showing posts with label chocolate chip. Show all posts

Sunday, November 4, 2012

Pumpkin Streusel Muffins

Submitted by Heather

Okay, this isn't really a brand new recipe, it's a variation of one I posted already on this site.  My family really loves these pumpkin muffins - they're moist and soft and turn out perfect every time.

I find, though, that for different people in my family, I have to modify them a bit.  The older kids like regular sized muffins with chocolate chips throughout the muffin.  My preschooler loves the mini muffins with mini chocolate chips.  Or maybe I love to give those to him because they fit so perfectly in his little fist, and the small chocolate chips make it so that he doesn't make quite so big a mess.  Then there's Daddy.  He doesn't really like the chocolate chips in the muffins at all.  Weird, I know.

So, years ago I found a streusel recipe and I've been topping these muffins with it ever since.  It's crunchy, has fiber and makes the muffin feel special (but maybe you don't care how the muffin feels).  The best combination, in my opinion, is a regular sized muffin with chocolate chips inside AND streusel topping.  Now everyone is happy!

Here's the link to my favorite pumpkin muffins:
Pumpkin Chocolate Chip Muffins

Streusel Topping:
3 T. flour
1/3 C. brown sugar
2 tsp. cinnamon
1/2 C. All-Bran (or you can use crushed bran flakes or even Cracklin' Oat Bran chopped up!)*
3 T. softened butter
1/4 C. chopped pecans (or walnuts if you prefer)

Mix all ingredients until crumbly and divide among muffins before baking.

*The muffins in this picture have streusel with Cracklin' Oat Bran in them.  It's all I had on hand and it worked great.  Chopping the cereal was a bit difficult but the chunks just lent to the crunchiness of the topping.
                          

Source: unknown

Monday, May 14, 2012

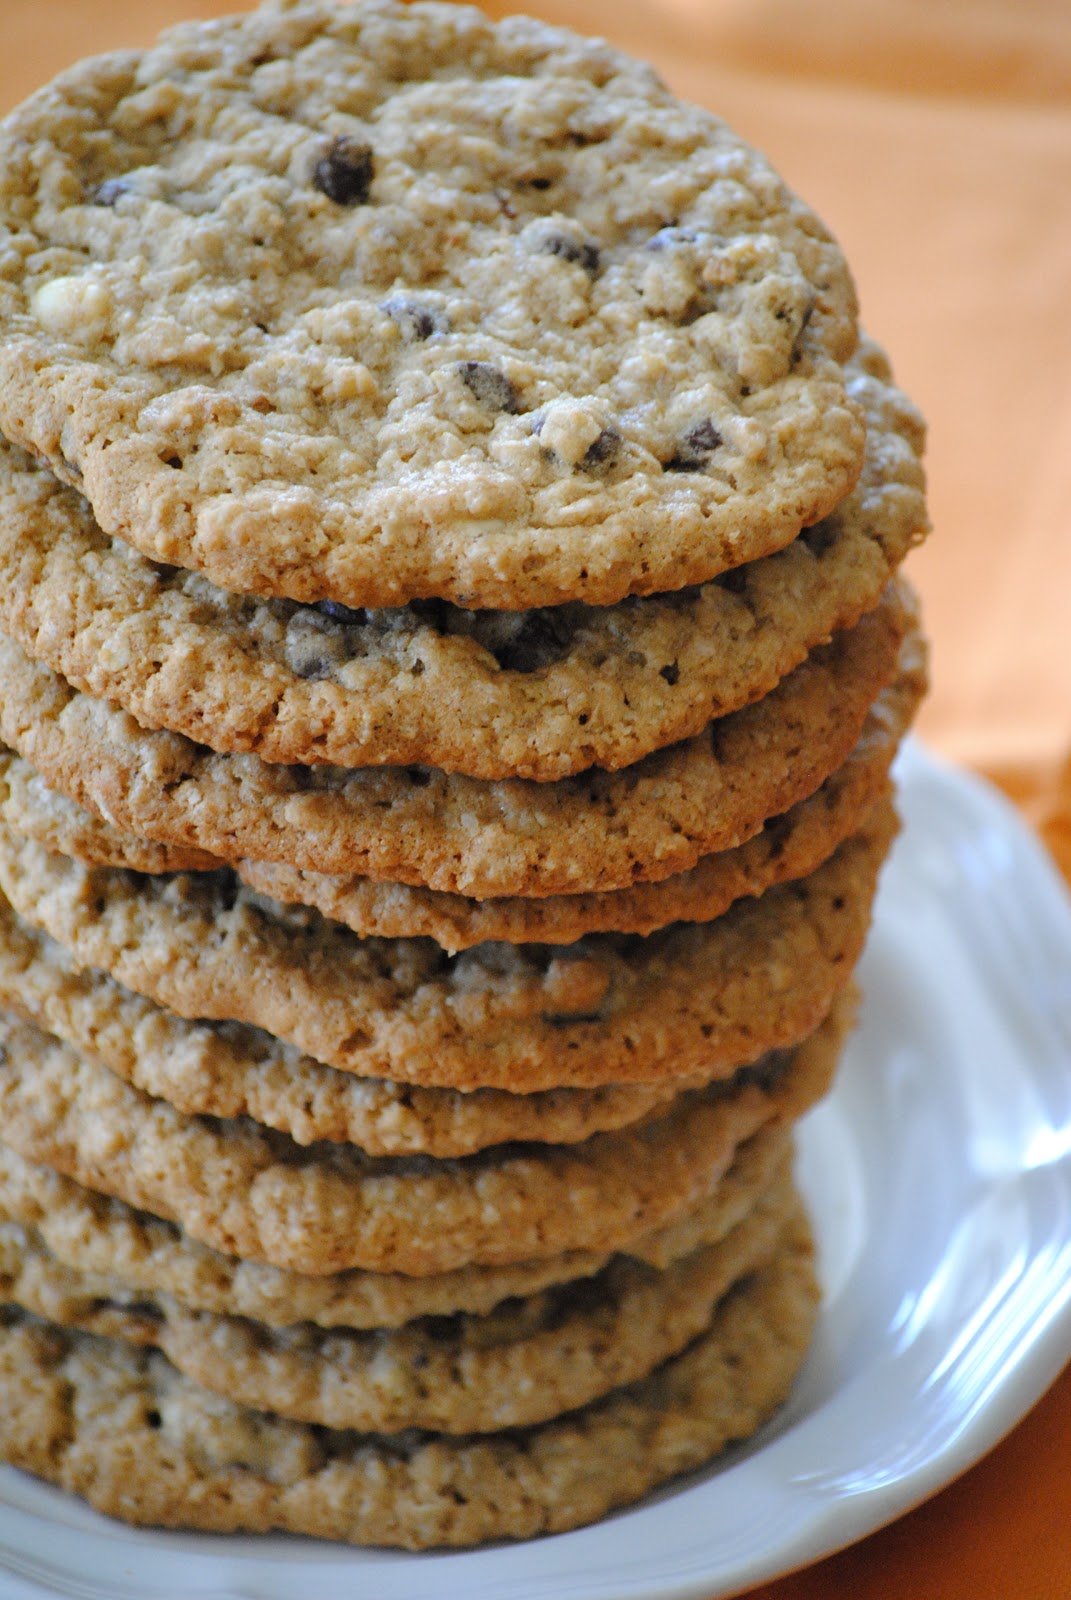
Oatmeal Chocolate Chip Crispies

Submitted by Heather

I love oatmeal cookies, but have sometimes been disappointed in their floury or dense results. Thankfully that doesn't happen too often, and especially not since I found this recipe.  These cookies are crisp on the outside edges and chewy in the middle.  Perfect.  My husband and I love nuts, but the kids don't always like them in their cookies, so this recipe is actually perfect.  The nuts are chopped finely enough that the kids actually have no idea that there are even nuts inside!  So, there's a little hidden nutrition for ya.  But my husband likes nuts to make their presence known, so I throw some roughly chopped ones on top of his cookies, and everyone is happy.

Both sizes of these cookies were very well received, but the extra large ones, were, of course, preferred by all.  The large ones were made with an ice cream scoop and the smaller ones made with a disher that holds about 2 Tbsp.

Be sure to double this recipe - you won't be sorry!


Ingredients:
1/2 cup Shortening (Crisco)
1/2 cup butter
1 cup Packed Brown Sugar
1 cup Sugar
2 whole Eggs
1 teaspoon Vanilla
1-1/2 cup All-purpose Flour
1 teaspoon Salt
1 teaspoon Baking Soda
3 cups Quick Oats
1/2 cup Finely Chopped Pecans
1/2 cup roughly chopped Pecans (optional)


In a large mixing bowl, cream shortening with both sugars until well combined.

In a separate bowl, beat eggs together. Add vanilla and stir to combine. Add to the shortening/sugar mixture and mix well.

In a separate bowl combine the flour, salt and baking soda. Mix carefully into the egg/shortening mixture until well combined. Now add the quick oats and mix well again. Finally add the finely chopped pecans and mix well to combine.

Divide the dough in half and place each half of the dough onto a sheet of waxed paper. Roll the dough into a log and then wrap it tightly in the waxed paper. Now you can either chill or freeze the dough until later or you can go ahead and slice the dough evenly into cookie rounds.
When you are ready to bake them place them on a cookie sheet and bake at 350 degrees for 10 minutes until they are golden brown. If you make the larger cookies (with the ice cream scoop) bake for a few minutes longer - around 12-14 minutes.


Source: adapted slightly from thepioneerwoman.com

Monday, November 14, 2011

Thick and Chewy Chocolate Chip Cookie Bars

 Posted by Lisa


I have made blonde brownies and tried other cookie bar recipes and I think I like these the best.  For one, there isn't a cup of oil in them!  Yuck.  They baked up a lot nicer and the center cooked through better than other ones.  I did have to bake it longer than it asked for, that might just be an oven difference.  Needless to say, they were for a football banquet and there were only crumbs left.  Very good.

Makes a 9x13 inch pan of bars

2 1/8 c all purpose flour
1/2 tsp salt
1/2 tsp baking soda
12 tbsp butter (1 1/2 sticks), melted and cooled slightly
1 c brown sugar
1/2 c granulated sugar
1 large egg
1 large egg yolk
2 tsp vanilla
2 c chocolate chips (use your preference, semi sweet, bitter sweet, milk, white, peanut butter...)

Preheat the oven to 325 degrees.  Adjust the oven rack to the lower middle position.  Line a 9x13 pan with foil or parchment leaving some to hang over the edges of pan for removal.  Spray the lined pan with cooking spray.

Mix the flour, salt, and baking soda together in medium bowl;  set aside.  Whisk the melted butter and sugars in a large bowl until combined.  Add the egg, egg yolk, and vanilla and mix well.  Using a rubber spatual, fold the dry ingredients into the egg mixture until just combined; do not over mix.  Fold in the chocolate chips and turn the batter into the prepared pan, smoothing the top with the spatula.


Bake until the top of the bars are light golden brown, slightly firm to the touch, and edges start pulling away from the sides.  24-28 minutes.
 (I had to cook it quite a bit longer for the middle to be done)  Cool on a wire rack.  Remove bars from the pan by lifting the overhanging lining and cut into 2 inch squares.

Source:  My Kitchen Cafe, originally adapted slightly from Cook's Illustrated

Thursday, June 23, 2011

Cinnamon Chocolate Chip Cake

Submitted by Hannah

I'm sure my sisters remember this cake fondly. My Mom made this often when we were young and it was one of our favorite desserts. Eating it again reminds me why we all loved it so much. I know there are many who aren't fans of the "boxed" cake mixes but I happen to like them, not as much as homemade but I still like them. This recipe calls for a boxed mix but with all the additional ingredients you would never be able to tell and it is a huge time saver. With the filling in this cake there is no need for a frosting, it is delicous just like this.


Ingredients:


Cake Batter-

4 eggs
1 cup sour cream

1 yellow cake mix

1 small box of vanilla instant pudding

3/4 cup water

1/2 cup oil


Filling-

6 oz. mini chocolate chips (important that they are mini or else they can sink into the batter)

1 tsp cinnamon

2 tsp cocoa

1/2 cup sugar (brown sugar or a mix of the two are fine also)


Combine batter ingredients and beat 3-4 minutes. Mix filling ingredients and set aside. Grease a bundt pan heavily (I spray mine with cooking spray and shake flour in the pan, pour off the excess flour). Put 1/3 of the filling in the bottom of the pan cover with 1/2 the batter then another 1/3 of the filling cover that with the last of the batter and finish the top with the remaining 1/3 of the filling. Bake at 325 for 50-60 minutes until toothpick comes out clean.


Saturday, June 11, 2011

Banana Boats

Submitted by: Hannah


On Monday nights in our house we have family night and we always make some sort of treat. I found this recipe in a church cookbook and since it only has 3 ingredients I thought it was a perfect dessert for my son to help with. I picked this because I thought he would love it, and he did, but I loved it too. It is simple and delicous and it takes under 10 minutes to make. Now, that is my kind of treat!


Ingredients:

bananas (they don't have to be to ripe but not green)

mini marshmallows

chocolate chips


Directions:
Leaving the banana peel on cut down the banana lengthwise but don't go through the other side. Open the cut you just made so there is room to stuff the goodies. Take a piece of tin foil that is big enough to cover your banana. Put your banana on the tin foil and put as much of the mini marshmallows and chocolate chips that you like or that you can fit inside the opening you made. When finished filling it, leave the banana standing up and bring the tinfoil up around it and make sure it is enclosed. You will bake these bananas at 400 degrees for about 8-9 minutes. You can either eat these right out of the peel or carefully remove them from the peel and put them on a plate. Yum!!

*This is also a great campfire snack, you would make them the same way but your cooking time may not be as long.


Source: Barbara Smith

Monday, May 23, 2011

Chocolate Chip Cookie Bliss

Submitted by Heather
I don't really feel like I need a new chocolate chip cookie recipe, but everywhere I look there is someone claiming THEIRS is the best/softest/chocolatiest, etc..  I've tried many and  found some great recipes.  This recipe caught my eye because it 1) uses bread flour and cake flour, which is unique and 2) requires (okay, strongly requests) that you wait at least a day before  you bake them.  What?!  The idea is that with the wait time, the flour in the cookies have enough time to hydrate, resulting in a much drier dough and a softer and chewier cookie.  At least I think that's the science behind it!  


I will say that these cookies are wonderful.  The texture is crispy on the outside, chewy on the inside and the little surprise of salt sprinkled on the top is very welcome and delicious.  So, make the dough and hide it at the back of your fridge so that no one knows you made it (allowing yourself, of course, to snitch some of the dough during the long wait).  Then you can surprise everyone with some fantastic cookies the next day and they'll all wonder where they came from.  Heaven.
By the way, the cookies in the picture at the top and bottom of this post are sitting on the same plate, but used very different quantities of dough. The average-sized-cookies at the top of this post are made with a cookie scoop that holds about 2 Tablespoons of dough, and the ones right above this paragraph followed the instructions in the recipe below which required me to weigh them (about 3 1/2 ounces).  The small ones are yummy, but you must also try the big ones - the contrast in textures is delish.


The Perfect Chocolate Chip Cookies

Yield: 1 1/2 dozen 5-inch cookies.

•2 cups minus 2 tablespoons (8 1/2 ounces) cake flour * leave the TBs in for high altitude*
•1 2/3 cups (8 1/2 ounces) bread flour
•1 1/4 teaspoons baking soda
•1 1/2 teaspoons baking powder
•1 1/2 teaspoons coarse salt (I used kosher salt)
•2 1/2 sticks (1 1/4 cups) unsalted butter
•1 1/4 cups (10 ounces) light brown sugar
•1 cup plus 2 tablespoons (8 ounces) granulated sugar
•2 large eggs
•2 teaspoons natural vanilla extract
•1 1/4 pounds (20 oz.) bittersweet chocolate disks or fèves, at least 60 percent cacao content (see note)
•Sea salt (or kosher salt)

1. Sift flours, baking soda, baking powder and salt into a bowl. Set aside.

2. Using a mixer fitted with paddle attachment, cream butter and sugars together until very light, about 5 minutes. Add eggs, one at a time, mixing well after each addition. Stir in the vanilla. Reduce speed to low, add dry ingredients and mix until just combined, 5 to 10 seconds. Drop chocolate pieces in and incorporate them without breaking them. Press plastic wrap against dough and refrigerate for 24 to 36 hours. Dough may be used in batches, and can be refrigerated for up to 72 hours.

3. When ready to bake, preheat oven to 350 degrees F. Line a baking sheet with parchment paper or a nonstick baking mat. Set aside.

4. Scoop 6 3 1/2-ounce mounds of dough (about 1/3 cup) onto baking sheet, making sure to turn horizontally any chocolate pieces that are poking up; it will make for a more attractive cookie. Sprinkle lightly with sea salt/kosher salt and bake until golden brown but still soft, 18 to 20 minutes. Transfer sheet to a wire rack for 10 minutes, then slip cookies onto another rack to cool a bit more. Repeat with remaining dough, or reserve dough, refrigerated, for baking remaining batches the next day.

source:  http://www.thesisterscafe.com/ (and The New York Times, David Leite and Jacques Torres)