Lemon Poppy Seed Pound Cake

Friday, March 16, 2012

Thick and Chewy Triple Chocolate Cookies


These cookies have been a long-time favorite. If you need a deep, dark chocolate fix and want more than just a hunk of chocolate (though that definitely has its time and place), look no further. Sometimes you just need the substance of a cookie, you know? That beautiful aroma of the warm, dark chocolate coming out of the oven is irresistible. My kids came flocking (and with 5 kids, they really do flock) when they started to smell these. One of my kids said, "Are they just brownies in a cookie shape?" I had to say "no," because while they are very chocolatey like brownies, there's something different. Maybe it's because more surface area is exposed to the heat of the oven and that makes them chewier? Maybe it's because you can eat it without crumbs falling all over from all sides? Oh, I'm just rambling now, but the bottom line is that these are fantastic cookies and anyone I've ever fed them to agrees. I wish I could take credit for the recipe!

When my sisters were recently visiting I brought some of these to the airport when I picked them up. It was a good way to start the weekend. By the next day they were calling them "devil cookies" because none of us could stop eating them! If you're wondering if it's worth using so much chocolate on one recipe, don't bother. It's totally worth it.

Thick and Chewy Triple Chocolate Cookies

2 cups (10 oz) all-purpose flour
1/2 cup (1 1/2 oz) Dutch-processed cocoa powder
2 tsp baking powder
1/2 tsp salt
16 oz semisweet chocolate, chopped
4 large eggs
2 tsp vanilla extract
10 tbsp (1 1/4 sticks) unsalted butter, softened but still cool
1 1/2 cups packed (10 1/2 oz) light brown sugar
1/2 cup (3 1/2 oz) granulated sugar
12 oz. (2 C.) semi-sweet chocolate chips

Combine the flour, cocoa powder, baking powder and salt in a medium bowl. Whisk together; set aside.

Melt the chocolate in a heatproof bowl set over simmering water until completely melted and smooth; remove from the heat. (Alternatively, microwave the chocolate in 30 second intervals, mixing thoroughly in between, until melted and smooth.) In a small mixing bowl, combine the eggs and vanilla.

In the bowl of an electric mixer fitted with the paddle attachment, beat the butter at medium speed until smooth and creamy, about 5 seconds. Mix in the sugars until well combined, about 45 seconds – the mixture will look granular. Reduce the mixer speed to low and gradually beat in the egg mixture until incorporated, about 45 seconds. Add the chocolate to the bowl in a steady stream and continue beating until combined, about 40 seconds. Scrape the bottom and sides of the bowl with a rubber spatula. With the mixer at low speed, add the dry ingredients and mix just until incorporated, being careful not to overbeat. Stir in the chocolate chips. Cover the bowl with plastic wrap and let stand at room temperature until the consistency is scoopable and fudge-like, about 30 minutes.

While the dough rests, preheat the oven to 350 degrees F. Line 2 baking sheets with parchment paper or silpats. Scoop the dough onto the prepared baking sheets with a 1 ¾-inch cookie dough scoop, spacing the dough balls about 1 ½ inches apart.

Bake until the edges of the cookies have just began to set but the centers are still very soft, about 10-12 minutes, rotating the sheets halfway through baking. Cool the cookies on the sheets about 10 minutes then transfer to cooling racks and allow to cool completely. Cool the baking sheets before baking more batches with the remaining dough.

Source: The New Best Recipe


Wednesday, March 14, 2012

Barbecue Chicken Salad with Cilantro Lime Ranch Dressing


Recently my three sisters came to my house for a "sisters' weekend" visit.  We had so much fun!  It was the first time we'd ever done anything like that, and while I still had my kids to take care of, my sisters pitched in and helped a ton.  They even cleaned out and rearranged a few rooms for me!  Now that's love.  One of the meals we had during their stay was this salad.  It is one of my favorites.  My friend, Lara, from recipeshoebox.blogspot, introduced it to me a few years ago and I've been making it loyally ever since.  She has lots of great recipes on her website, so you should check it out.

When I first read this recipe I thought that the combination of bbq chicken and mexican-type ingredients was a strange one.  But boy does it work.  I must say, though, that the absolute star of the show is the dressing.  For best results, make it a few hours or a day ahead to let the flavors really come together. Do not make substitutions, like Miracle Whip or off-brand ranch dressing packets.  I did that once and was horribly disappointed.  I am not lying or exaggerating either, when I admit that we sisters were eating the dressing out of the container with spoons.  Sounds disgusting, right?  Wrong!  Just make it and you'll see.

BBQ Chicken Salad with Cilantro Ranch Dressing
Note: I find it easiest to cook the chicken in a crockpot and make the dressing the morning of or evening before I want to serve it.  After the chicken is done cooking, just drain it and mix in the bbq sauce.  Doing it ahead of time ensures that all the flavors have melded and makes it quite easy to throw the whole salad together.

The ingredients:
2 hearts of Romaine, chopped
1 can corn, drained (or 15-oz. frozen white corn, thawed)
1 can black beans, drained and rinsed
15 grape tomatoes, halved (or just chopped tomatoes)
3-4 cooked chicken breasts, cubed or shredded
favorite BBQ sauce
shredded Mozzarella cheese

DRESSING:
1 envelope Hidden Valley Ranch dressing
1 cup mayonnaise
1 cup milk
1/2 bunch cilantro
1-2 cloves of garlic
juice of one lime (or 2 Tbs.)

Place lettuce in a serving bowl. Layer with corn, black beans, and tomatoes. Mix cooked chicken with BBQ sauce and top over salad. Sprinkle mozzarella over the top.

Place dressing ingredients into blender or food processor and combine well.  Drizzle over salad.

Source: recipeshoebox.blogspot.com

Thursday, March 8, 2012

Almost Famous Chocolate Mousse Cake


Source: Food Network Magazine March 2012
Submitted by : Lisa

Quote from a friend "Chocolate doesn't usually excite me, but this excited me!  I want the recipe!"  I brought some into work after Valentines day and shared.  They love me.  I have tried a few different types of chocolate desserts and am usually disappointed by the flavor.  So, I was leery when I set out to make this one.  It calls for quite a few ingredients and I didn't want to waste the money if it wasn't going to be eaten.  Rest assured, no waste of money here.  The texture was wonderful, and the flavors equally pleasing.  One thing to be sure of, buy good quality chocolate for the recipe.  That is where you will get the best flavors!  Give it a try.  Although there are many steps, none of them are difficult.  Good luck!


For the cake and mousse:
1 18.25 ounce box devil's food cake mix (plus those required ingredients)
14 ounces bittersweet chocolate chopped
12 tbsp unsalted butter diced (1 1/2 sticks)
1/4 c strong coffee ( I used hot chocolate since I don't drink coffee)
10 large eggs, seperated
1 1/2 c plus 6 tbsp sugar
1 tsp vanilla
1/2 tsp salt
2 cups cold heavy cream

For the shell and sauce
12 ounces bittersweet chocolate chopped
3/4 c heavy cream
5 tbsp light corn syrup
2 tbsp unsalted butter

To Serve
1 1/2 c cold heavy cream
1 tbsp sugar
1 pint vanilla ice cream  ( I didn't use any of this stuff to serve )

1.  Make the cake:  Prepare the cake mix as the label directs for a 9x13 inch cake pan.  ( I used a spring form pan about 9 inches)  Bake; cool slightly in the pan, then invert onto a rack to cool completely.


2.  Clean out the cake pan and line it with plastic wrap.  cut the cake in half lengthwise, then in thirds crosswise to make 6 rectangles.  Using a serrated knife, slice each rectangle in half to make two layers.  Arrange half of the pieces snugly in the cake pan.   Crumble the remaining pieces and press tightly into 6 small balls;  arrange 1 cake ball in the center of each cake rectangle in the pan.  (I did not make rectangles.  I just cut the cake in half to make 2 layers and crumbled the 1 layer and placed the balls around the bottom layer in the spring form pan)


3.  Make the mousse:  Heat the chocolate, butter, coffee and 1/4 c water in the heatproof bowl set over a saucepan of simmering water (do not let the bowl touch the water), stirring, until melted.  Remove the bowl from the pan;  stir until cool.  Reserve the simmering water.  fill a large bowl with ice water.


4.  Whisk the egg yolks, 1 1/2 cups sugar and 2 tbsp water in  a separate large heatproof bowl.  Set the bowl over the saucepan of simmering water and whisk until pale yellow, 6 to 8 minutes.  Add the chocolate-coffee mixture and the vanilla and whisk until combined, about 2 minutes.  Remove the bowl from the pan and set in the bowl of ice water;  whisk until slightly cool but not thick, about 4 minutes.


5.  Beat the egg whites and salt in a bowl with a mixer until foamy.  Add 2 tbsps sugar and beat until lmost stiff;  gently fold into the chocolate-yolk mixture to make a dark chocolate mousse.  Spread 5 cups over the cake and cake balls.  Freeze until firm on top, about 30 minutes.


6.  Beat the heavy cream and the remaining 4 tbsp sugar until soft peaks form;  fold into the remaining mousse.  Remove the cake from the freezer; spread with the light chocolate mousse, cover with plastic wrap and freeze until firm, at least 6 hours or overnight.


7.  Make the chocolate shell:  Stir the chocolate, heavy cream and 4 tbsp corn syrup in a heatproof bowl set over a saucepan of simmering water (do not let the bowl touch the water) until melted.  A spoonful at a time, spread half of the shell mixture over the frozen mousse.  Return to the freezer.


8.  Make the chocolate sauce:  Add the remaining 1 tbsp corn syrup and the butter to the remaining chocolate shell mixture.  Microwave 30 seconds, then stir until glossy.
(I didn't do these next steps.  Mine was quite tall in the spring form pan.  I topped with chocolate designs)


9.  To serve the cake, beat the heavy cream with a mixer until foamy.  Add the sugar and beat until soft peaks form.  Remove the cake from the freezer, invert onto a baking sheet and unmold, then invert again onto a platter, chocolate shell side up.


10.  Cut the cake in half lengthwise using a warm knife, then cut into thirds crosswise to make 6 rectangles;  cut each rectangle in half diagonally to make 2 triangles.  Top each triangle with whipped cream, ice cream and the prepared chocolate sauce.

Tuesday, March 6, 2012

Peanut Butter Chewy Brownies

Submitted by Lisa

I got this recipe from the Penzeys Spices spring 2012 catalog.  (great spice store!) I made them last night and half the pan was gone this morning.  Similar to a blonde brownie in texture but with the peanut butter in there it has a ...peanut butter taste!

Ingredients

1 cup peanut butter
2/3 c softened butter
1 1/3 c sugar
1 c brown sugar
2 eggs
1 tsp vanilla extract
2 cups flour
2 tsp baking powder
1/2 tsp salt
1 1/2 cups chocolate chips

Preheat oven to 350.  Grease a 9x13 pan.  In medium bowl, cream together the peanut butter and butter.  Gradually blend in the sugars, eggs and vanilla.  Mix until light and fluffy.  Mix in the dry ingredients and stir until blended.  Stir in the chocolate chips.

Spread into the prepared pan and bake for 25 to 35 minutes or until tooth pick comes out clean.  Cool completely then cut into squares.

Sunday, March 4, 2012

Quick Bread Sticks


This recipe is from a personal cookbook that was given to me by a lady who is no longer with us...It is a great, fast recipe you can make from start to finish in 1 hour.  This recipe is definitely a basic dough...not much flavor.  BUT you get to make it into what ever you need!  It is a springy type of bread stick, and the kids just love them.

Ingredients:

1 tbsp yeast
1 1/2 c warm water
2 tbsp sugar
1/2 tsp salt
3 cups flour
FLAVORS (garlic, chives, green onions, cheese, season salt...)
butter

Dissolve yeast in warm water.  Mix and knead all ingredients for 3 minutes. (this is where you would want to add the flavor of your choice.  Today I added garlic, minced fine and then brushed the dough with butter and cooked it, when it came out I brushed with more butter and sprinkled with Parmesan cheese)  Let rest for 10 minutes.

Roll out of bowl onto a floured surface.  Dough is very soft.  Just spray a cookie sheet, gently place the dough in the center, pat into a large circle with your hands and then cut with a knife into strips.

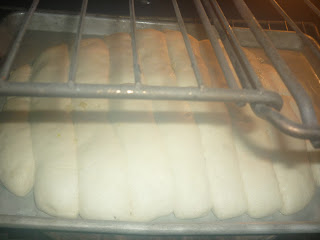
Brush the strips with melted butter and garlic.  Place in a warm spot until they have risen.  (I usually heat up the oven a bit then turn it off and place them in there to rise)  Once risen, turn oven to 375 and bake for 20 to 30 minutes.


When they come out, you can brush them again with butter and sprinkle with Parmesan cheese and serve! YUM

Friday, March 2, 2012

Lemon Crinkle Cookies


Most of the time when I think of making something for dessert, I find myself looking at chocolate.  That is definitely not a bad thing.  Chocolate is the best.  But once in a while I get a hankering for lemon or berry or some other flavor.  As soon as I saw these cookies, I knew I wanted to make them.

There was no way I was going to be able to make the one small batch the recipe calls for below.  I had to double it (and I probably should have tripled it).  There are just too many people to share them with, and that's not even counting my kids!  The recipe here is the original, so if you want it doubled, you will have to get those rusty math skills out and start doubling.

The only problem I had with this recipe was with the cooking time.  It really should be a few minutes longer.  After letting a couple of the pans cool off, I ate a cookie and it had that raw dough flavor (see picture below).  Thankfully I hadn't made the last batch yet, so I left them in extra long and ended up loving the cookie.  It really is buttery and lemony with a softer center and delicious crunchy edges.

Lemon Crinkle Cookies
Makes 2-3 dozen

Ingredients:
½ cups butter, softened
1 cup granulated sugar
½ teaspoons vanilla extract
1 whole egg
1 teaspoon lemon zest
1 Tablespoon fresh lemon juice
¼ teaspoons salt
¼ teaspoons baking powder
⅛ teaspoons baking soda
1-½ cup all-purpose flour
½ cups powdered sugar

Directions:
Preheat oven to 350 degrees. Grease light colored baking sheets with non-stick cooking spray and set aside.

In a large bowl, cream butter and sugar together until light and fluffy. Whip in vanilla, egg, lemon zest, and juice. Scrape sides and mix again. Stir in all dry ingredients slowly until just combined, excluding the powdered sugar. Scrape sides of bowl and mix again briefly. Pour powdered sugar onto a large plate. Roll a heaping teaspoon of dough into a ball and roll in powdered sugar. Place on baking sheet and repeat with remaining dough.

Bake for approximately 11 minutes or until bottoms begin to brown and cookies look matte {not melty or shiny}. Remove from oven and cool cookies about 3 minutes before transferring to cooling rack.

*If using a non-stick darker baking tray, reduce baking time by about 2 minutes.


(These are the cookies that were okay, but not cooked long enough.  See the picture above for nice, crispy edges!)

Source: Lauren Brennan; laurenslatest.com