Saturday, December 31, 2011

Cream Biscuits


This recipe is from www.foodnetwork.com....the southern Queen Paula Deen.  I had left over cream in the fridge and while looking for a biscuit recipe this morning saw this one...they are in the oven right now!   

(my husband who is a biscuit freak, topped his with sausage gravy, took a bite and said "these are amazing"....he has never said that about other home made biscuits!!)


Cream Biscuits

Recipe courtesy Paula Deen

Prep Time:
5 min
Inactive Prep Time:
--
Cook Time:
10 min
Level:
Easy
Serves:
10 to 12 biscuits

Ingredients

  • 2 cups self-rising flour, plus more for dusting
  • 1 tablespoon sugar
  • 1 1/2 cups heavy whipping cream

Directions

Preheat oven to 500 degrees F.
In a medium bowl, stir together the flour, sugar, and cream until the dough forms a ball. Turn the dough out onto a surface dusted with additional flour. Fold the dough in 1/2 and knead 5 to 7 times, adding just enough flour to keep dough from sticking to your hands. Gently roll out dough to 1/2-inch thickness. Using a 3-inch biscuit cutter coated with flour, cut dough into biscuits.
(I cut into squares so I don't have any little left over pieces)
Place on baking sheet coated with cooking spray, leaving at least 1-inch between each biscuit. Bake for 10 minutes, or until golden brown.

Wednesday, December 28, 2011

Taco Dip


Submitted by Lisa

Ingredients:
1 can refried beans
1/2 jar taco sauce
1/2 jar black bean/corn salsa
1 brick cream cheese
1 lrg container sour cream
shredded lettuce
shredded cheese
chopped tomato


1.  Mix beans with the salsa and put on platter/dish
2.  Mix the cream cheese and sour cream and taco sauce, pour over the beans.


3.  Top with the lettuce, cheese and tomatoes.
Serve with tortilla chips

***additional toppings as desired:  olives, onions...***


Monday, December 26, 2011

Dried Beef & Pickle Dip


Submitted by Lisa
I am sure many of you have made a version of this dip.  
We just love it.  
Great one to have for the holiday season!

Ingredients:

1 block cream cheese
1 large container of the whipped cream cheese
1 jar dried beef
dill pickles...about 10 small to medium
pickle juice

1.  cream the cream cheeses together adding pickle juice to loosen it as needed.
2.  chop the dried beef into small pieces
3.  chop the pickles into small pieces
4.  Stir everything together and chill.  
Serve with crackers

***My husbands variation:  he likes to make this with out the dried beef, and he adds chopped jalapeno's and shredded cheese***

Friday, December 23, 2011

Balsamic Glazed Pork Roast


I'm always looking for good slow cooker recipes.  My days with 5 kids can get pretty crazy and nothing beats having dinner already cooking in the morning.  The after-school rush with sports and activities on its heels can be a really stressful time to be throwing together a meal.  If I know one of those crazy days is on the horizon I try to plan a meal like this one.  And if you have a rice cooker, it's even easier to get everything done in time. All of my kids liked the sweet balsamic vinegar glaze.  I loved it and took the opportunity to dip my green beans and rice in it too.  Enjoy!
*Note: This recipe is easily doubled - increase all the amounts (for the pork or the glaze) if making a larger roast.
*Serves 6-8
Pork:
2 pound boneless pork loin roast, trimmed of large fat pockets
1 teaspoon ground sage
1/2 teaspoon salt
1/2 teaspoon pepper
1 clove garlic, finely minced or crushed
1/2 cup water
Glaze:
1/2 cup brown sugar, light or dark
1 tablespoon cornstarch
1/4 cup balsamic vinegar
1/2 cup water
2 tablespoons soy sauce
In a small bowl, combine the sage, salt, pepper and garlic. Rub the spices all over the roast. Place the pork roast in the slow cooker and pour in the 1/2 cup water. Cover and cook on low for 6-8 hours. Near the end of the cooking time for the roast, combine the ingredients for the glaze in a small saucepan and bring the mixture to a boil, then reduce and let the mixture simmer, stirring occasionally, until it thickens.
Remove the pork from the slow cooker, shred and place on a platter or plate. Drizzle the glaze over the pork and serve.

Source: melskitchencafe.com

Monday, December 19, 2011

Brownies with Mint Frosting


Boy, what a boring name for a super-yummy dessert!  I was trying to come up with something catchy, but my late nights of present wrapping sapped my brain of any creativity.  I think we've all had a version of these, and most people I know love them.  I have a number of go-to brownie recipes that I use in different situations - some are very fudgy, some are so full of chocolate that you can't figure out a way to add more, and some are more on the cakey side, and the list goes on.  These brownies are up at the top of favorites.  Unless you don't like the chocolate/mint combination, I think you're going to love them too.  Plus, the mint layer can be tinted to be any color, so you can match your occasion!  Of course the light green seems perfect for anytime - especially the holiday season.  I made a double batch recently - one for our church's Christmas party and one for the hungry mouths around here and they were gone within 24 hours.  I may have eaten more than my share. So, do yourself a favor - make these brownies and share them with your neighbors. They'll love you for it.

Brownie layer:
2/3 C. butter (oh, I guess you could use margarine, but I wouldn't recommend it!)
6 oz. semi-sweet chocolate chips (about 1 C.)
1-1/2 C. sugar
1 C. all-purpose
1/3 C. cocoa
1 tsp. vanilla
1/2 tsp. baking powder
1/2 tsp. salt
3 eggs

Heat oven to 350 degrees.  Grease a 9x13 inch baking pan.  In a large microwave safe bowl, place butter and 1 cup chocolate chips.  Microwave on high for 1 to 1-1/2 minutes or until chips are melted when stirred. Add sugar, flour, cocoa, vanilla, baking powder, salt and eggs; stir with spoon until smooth.  Spread batter into prepared pan.  Bake 30 minutes or until center is set.  Cool completely in pan on a wire rack before topping with frosting layer.

Mint Frosting Layer:
1/2 cup butter (1 cube), room temperature
2 cups powdered sugar
1 tsp peppermint extract
1 Tb heavy cream
green food coloring

Beat all ingredients together until smooth, adding desired amount of food coloring.

Chocolate Ganache Layer:
1 cup semi-sweet chocolate chips
2 Tb heavy cream
1 Tb light corn syrup

Place chocolate and corn syrup in glass bowl and microwave on 70% power for 1 minute. Stir (they won’t be completely melted yet) Add cream and microwave again for 30 seconds on 70% power. Stir until smooth.
Once brownies are completely cool, spread mint creme layer on top evenly. Cool until hard in the refrigerator. Then pour chocolate ganache over the top of the mint creme layer and very gently spread to cover it all. Make sure you gently spread the ganache so as not to dig too deep and hit the creme! If that does happen, no big deal. Just stop and gently cover it up with ganache from another area and proceed. Let cool – ganache will harden slightly. Cut in squares with sharp knife. (You can warm the knife with warm water to make it cut super smoothly – just rinse and dry between every several slices.)

Source: Brownies - not known, but I think it may be from a bag of Hershey's mint chocolate chips. 
Mint frosting and ganache frosting: thesisterscafe.com

Tuesday, December 13, 2011

Navajo Tacos

Posted by Lisa


We love these!  I think most people have had something similar but may call them by different names.  This recipe is in a family cookbook I have had for years.  The recipe is from a little old lady who is no longer with us, so I can't confirm where she originally got it.

For a quick put together, just use chili instead of taco fixin's!


Ingredients:
4 cups flour
2 tsp salt
2 tsp baking powder
2 cups warm water

Mix all ingredients together gently to form a soft dough.  Heat oil either in a fry daddy or an inch in a frying pan.  Pull off a chunk of dough about the size of a tennis ball and flatten it out by hand.  Fry in the oil till golden on each side.  Top with either taco fixings or chilli!


**Tip** For the kids, I either rip it up then put the toppings on , or I fry tiny pieces of the dough instead of the big piece.

Wednesday, December 7, 2011

Pecan Turtles with homemade caramel

Posted by: Lisa


Ingredients:
2 cups sugar
12 tbsp evaporated milk (3/4 cup)
1/2 tsp salt
2 cups corn syrup (karo)
2 cups heavy cream
6 tbsp butter

Directions:
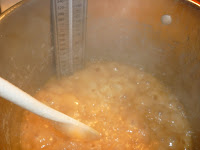
1.  cook sugar, syrup, and cream over medium/high heat to "softball" stage on a candy thermometer. Stir often until boiling.  Once it starts to boil, reduce heat to medium and only stir occasionally.  You can now insert the thermometer. 
(while working on step 1, I put the evaporated milk and butter in a microwave safe bowl and warm it up so when it is time to add it, the temp isn't so shocking)
2.  Once you have reached the softball stage, add the evaporated milk and butter 1 tbsp at a time stirring after each addition trying to maintain the temperature as much as possible.

3.  Cook it until you reach about 235 degrees.  Important at this point to do the "water test".  Have a small bowl of ice water near by.  As you are approaching the 235, drizzle a small amount into the water.  Let it sit for a minute and then pick it out with your hand.  Smoosh it around with your fingers.  If you can put it into a shape and it stays there, take it immediately off the heat.  If it just runs all over, you need to continue to cook it.  ***if it is too hard at this point, add about 1/4 cup of water to the caramel to bring the temp down.  And check it again at about 228 degrees.
Tip:  While the caramel is cooking, spread sheets of parchment paper (NOT WAX PAPER) on the counter and if making turtles, arrange the preferred nuts into little piles.

**When the caramel is to the right temperature, use a gravy laddle and pour caramel over each pile of nuts and allow to cool.


Once they are cooled, you can then top them with melted chocolate.
(if you have more caramel than nuts, poor the remaining caramel into a prepared pan ..line it with parchment paper...and when cool cut into caramels)